Saturday, January 31, 2009

North Florida Crossword Puzzle Tournament, and we have lights!

Today, Andrew, our friend Steve, and I competed in our second North Florida Crossword Puzzle Tournament. Our team, The Wordsmiths, were Runners Up, finishing just 5 points behind the winners. We hope to come back next year and take the Team Division title! The Tournament proceeds go to a local non-profit organization.


We got to meet crossword puzzle creator Merl Reagle, whose puzzles are featured in the San Francisco Examiner and The New York Times.

Merl was kind enough to autograph one of his puzzle books for us, and joined us for a photo:


After the big puzzle competition, we stopped by The Cottage, since the electrician had earlier today installed our new light fixtures. We have lights and working electrical outlets again in the kitchen and the bathroom!


The new pendant light over the dining area:

Although the globe looks yellow in the photo, it doesn't actually appear that way. It has low-energy CFL bulbs, like the other fixtures.


The bathroom ceiling fixture, ventilation fan, and sconce are all functional now.


Only thing is, I will have to pick up some more light bulbs, since I didn't buy enough at Super Wally World a couple nights ago, and that's why the sconce has only one bulb at the moment. By the way, this sconce was a real bargain, just $19.91 at Sam's!!


The plumber will be here Monday.

Tuesday, January 27, 2009

And, the winner is..

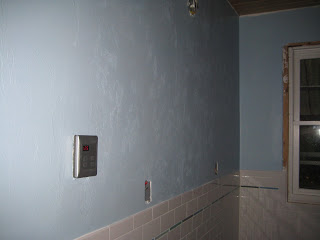
Well...neither Raindrop nor Cay ended up being the winner. Neither of the colors seemed to clearly be the favorite. In the end, we decided against both. We went to Sherwin Williams just before the store closed, and picked up a gallon of a totally different color. The winner: Vast Sky.


It took less than half a gallon to finish the room. These photos were all taken using only the flash, since we still have no lights in the bathroom, and the sun hadn't quite come up yet.

So far, so good. Or, maybe we're both just really tired of thinking about paint, looking at paint, buying paint, and painting. The bathroom floor is still covered with kraft paper, so, without the additional light reflected off the white tile floor, the real, true paint color still can't be judged fairly. I'm okay with that. We can always repaint, right?
The bathroom door, storage cubby, and window have now been trimmed out by J with cypress lumber.


The wood trim will all need to be clear-coated, but that can be done later. Or, maybe we will paint it instead.


The storage cubby, after 3 coats of primer, and still looking a bit peachy:

We have decided to paint the inside of the cubby with white semi-gloss, to keep the interior bright so we can find stuff in it later.
In the kitchen, we now have tile floors! The tile is Cotto Antico by Daltile. The color is called Aranciato. The grout color is Buff. There is still a little grout haze on the tile, but it looks terrific!


The kitchen countertop is nearly finished. Nearly finished because I had to order a few more tiles as a result of making two minor design changes regarding the backsplash behind the range. Fortunately, our tile supplier has been great to work with, and the needed tiles will be here on Thursday. Carlos will then finish up the backsplash and finish tiling up to the edge of the sink. He went ahead and started grouting today.
Here is a view of one corner of our new countertop (minus one corner bullnose tile that is on order)...

...the range backsplash (with a few tiles still missing):


And, the sink backsplash:


The tile is Intinta by Tesoro, which comes in about 20 colors. It is glazed porcelain. The main blue color is called Lavanda; the white is called Bianco. The grout color is Silverado.


A view of the grouted floor tile, looking in from outside the kitchen door:

Saturday, January 24, 2009

Raindrop or Cay? Another weekend of painting.


Today we spent our day sanding the cypress ceiling in the bathroom prior to applying clear-coat. Unfortunately, we found several splintered areas that needed to be glued down and re-sanded, and we never got around to applying the finish today.

Funny, other than lots of pencil marks, the beadboard in the kitchen had virtually no imperfections. The bathroom ceiling seems to have gotten all of the defects. The beadboard should all look fine after the glue dries completely and we finish sanding and give it two coats of satin polyurethane.
Next, Andrew started priming the bathroom walls. He worked on the cutting-in while I cleaned out, wiped down, and caulked the bathroom's storage cubby, which is still an icky peach color courtesy of a past makeover by the PHO. With the toilet out of the room, there won't be a better time to tackle this job.

Once the new toilet is installed, it will next to impossible to reach back into this tiny cramped space to paint (which is why it's still peach, even though I painted the rest of the room a few years ago). The gaps between the homemade shelves and surrounding walls have now been filled in nicely with caulk. It will probably take 2, maybe 3 coats of primer to cover the old glossy peach paint, but no doubt it will look much better once it gets a long-overdue repainting.

While we took a break for lunch, we visited our local paint store and picked up a couple of sample quarts of paint to help us decide on a color for the bathroom walls. Rather than applying paint samples directly onto our freshly-primed walls, we primed 2 small drywall scraps, so that we can paint them instead. Have I mentioned that painting has never been one of my favorite home improvement chores?

So, tomorrow we will finish the touch-up sanding of the cypress beadboard, then clear-coat the ceiling, finish priming the storage cubby, try out our paint samples on the drywall scraps, and maybe pick a color and start painting the walls!

Our 2 paint samples (Raindrop on the left, and Cay on the right) look almost identical in the photo, but one is actually a bit greener than the other.

These 2 colors were the final contenders we chose from several paint sample cards we compared by taping them to the walls and viewing under different lighting conditions.

I doubt "drop light," or "flashlight" conditions will influence our choice, but we have seen the various paint samples under those, as well.

Which one will be the winner, Raindrop or Cay? Stay tuned!

Thursday, January 22, 2009

Bathroom tile is finished, and we (almost) have a countertop!

Every day, the work goes on, and there is a bit more progress. On Wednesday, Carlos installed one final layer of Durock in the kitchen, finishing up the underlayment for the tile countertop:


He also finished grouting the bathroom walls and floor, so we now have a bathroom once again, minus the plumbing fixtures and lighting, but it's still an amazing and welcome sight! It's a great feeling to see it exactly as I had imagined it would look.

Meanwhile, in the kitchen, he has started working on the tile countertop:


Much of the countertop surface is already tiled. The backsplash will be done next, and all will be grouted:


The tile backsplash behind the range is coming along nicely. Another double row of 1" mosaics with a row of 4x4 blue squares to top it off, and it will be complete! The bottom edge of the range hood will rest just above the top edge of the tiles. We are really happy with the blue-diamonds-on-a-white-field design, and with Carlos's careful installation.


We will be sanding and varnishing the bathroom ceiling, and priming (and possibly painting) the bathroom this weekend, after which the rest of the electrical work (outlets and light fixtures in both rooms, and bathroom vent fan) can be completed. Next week: the kitchen floor tile.

Tuesday, January 20, 2009

Inauguration Day, a new kitchen sink, and the bathroom tile is nearly complete!

On this Inauguration Day, hope and positivity prevail! What an exciting time for our nation!
On the home front, the remodel is going smoothly, and the pace seems to have picked up, maybe because the structural work is now done, and the decorative, creative part- the best part- is the main focus now.
Andrew and I spent some time at The Cottage last weekend, cleaning up and putting one more coat of Friendly Yellow on the kitchen walls before the countertops were installed.

We decided to make an upgrade to one of our new cabinets. One of the lower cabinets contains pull-out shelves. When we ordered our cabinets, we went with the basic stock shelves, which have flexible white plastic rails around the edges, to keep objects from falling off. Andrew gets the credit for noticing that our current shelves just are not right, and look flimsy alongside the sturdy chrome rails on the shelves of the pull-out pantry. We have opted to replace the current shelves with box-like shelves that resemble shallow drawers. The new shelves will require upgraded ball-bearing slides. Making both changes will add just under $200 to the cost of the cabinet, but we think it will pay off in the long run. Luckily, our cabinetmaker will have the new shelves ready to install by Friday.

Upon careful inspection, we also realized that 3 of the new cabinet doors had minor dings to the wood finish. The affected doors have been taken back to the company's shop for sanding and refinishing. The doors will also be re-installed on Friday. We love the new cabinets, and have been very impressed by the cabinet company's efforts to make sure we are completely satisfied, right from the beginning. They have truly been a pleasure to deal with. (Shameless plug here for Town & Country Cabinets of High Springs, FL)!

Today, Carlos returned to grout the bathroom, and what a fine job he is doing!
Here are some photos of the grouted subway tiles:

Closeup of the glass pencil trim, which really has depth and sparkle now that it has been grouted:

And the junction of the grouted and not-yet-grouted walls:


And, in the kitchen, big news! The porcelain farmhouse sink has at long last been removed from its box and given a place of honor! The countertop construction has begun. The plywood and Durock underlayment is now in place, almost ready for tile to be set.
Here, Andrew stands beside the new countertop base around the kitchen sink, with the sink dry-fitted in its new home:


When we got to the Cottage this evening, it was immediately apparent to me that the sink had been installed backwards!
The guys evidently failed to notice the blue trademark stamped into the porcelain:

and had it facing the window, rather than the front. Andrew and I hoisted the sink off of its stand, gave it a 180-degree turn, and slipped it back into place. However, because this sink has an offset drain, the drain-hole that has been cut out of the wooden sink base will have to be corrected, but that should be a relatively easy fix. I blame the mixup on the fact that the installers are male and, as such, completely oblivious. (In their defense, Andrew also said that he didn't know the sink had a trademark until I pointed it out, so it must be a guy thing, and only confirms my suspicions).

The sink, correctly positioned:

and resting on its sturdy wooden base:


The bare wood sink base will be completely concealed behind wood trim and some fancy millwork when all is said and done. The space beneath the sink will be kept open (without cabinet doors), and a curtain will eventually cover the under-sink opening, to complete the country kitchen look.

Saturday, January 17, 2009

A peek at the bathroom floor, and the subway tile is up!

Carlos has now installed and grouted the bathroom floor tile (using pale gray grout- very nice!), and installed the bathroom wall tile. He will be coming back to grout the bathroom walls next week.
Installation of this small section of hex tile near the door threshold was delayed a couple of days while I quickly ordered additional tile from Tilehaus. Yes, I under-ordered.
After the floor was installed and grouted, and before the wall tiles were installed, the bathroom looked like this, to protect the new grout:

I had to take a peek at the floor when it was partly uncovered while Carlos finished tiling near the door:


Luckily, with a quick phone call I was able to order the extra tile, and it was shipped out the same day. It's still a mystery why there wasn't enough tile, since the bathroom is 8.5' x 6' (= 51 sq. ft.), and I ordered 62 square feet of tile (which included more than the standard 10% overage allowance). Does the 10% rule only apply to square tile? .....I'll have to think about that one......

Despite the minor delay, the installation otherwise went smoothly, and the new bathroom floor looks great, although it's mostly still covered by paper until the walls are grouted. Below are some photos of the bathroom with the wall tile installed, but not yet grouted.

We're very happy with the bathroom's new look, especially the glass pencil trim accent tiles!


Thursday, January 15, 2009

Kitchen cabinets are here!

This is a very busy time of year at the hospital and, due to our high census and a last-minute emergency, I ended up working until 7 p.m. last night, but I stopped by The Cottage to have a look at the new kitchen cabinets. The room was completely dark, since the electrical installation is still a work in progress, meaning no light fixtures or switches yet! These photos were all taken using only the camera's flash. Suddenly, we have a kitchen again!
Here is a view of the cabinets where the sink and dishwasher will be installed:

We opted to have the interior of the cabinets finished the same as the exterior: red oak:

The cabinets have Shaker-style doors, with beadboard insets. The hardware is satin nickel. Our new light fixtures will match.

Some of the upper cabinets have seeded glass insets, which had not yet been installed in this photo:

Inside the lower cabinet closest to the kitchen door is...

...our new pull-out pantry:

No more cereal boxes on top of the fridge!
After the glass was installed, a view through the seeded glass:


Meanwhile, the bathroom floor tile was grouted yesterday. No photos yet, because the entire floor is covered by a protective layer of brown kraft paper while the grout sets. We chose gray grout, as opposed to white, for the bathroom floor, to keep a more traditional look, since I have learned from the very helpful customer service rep at Tilehaus, hexagonal tiles were historically set using gray mortar.
Our tile order has come in at last, after a few weeks' delay, so tomorrow the the bathroom wall tile will be installed. The kitchen floor will be tiled next week.